I have been searching for a reasonable cheese vat solution. I have seen the contributions from others and they were the inspiration for my version. To complete my cheese vat, I only needed a couple of things. The list is below with pictures. There were only two things that were a challenge, cutting the metal and making sure you follow the wiring diagram. (It's not that complicated but I have done this stuff before and I screwed it up once. It just tripped the breaker and made me scratch my head.)
Necessary equipment: All free shipping
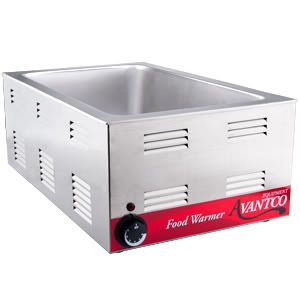
Commercial food warmer- $82.99 (I bought the Avantco version from webstaurantstore.com)
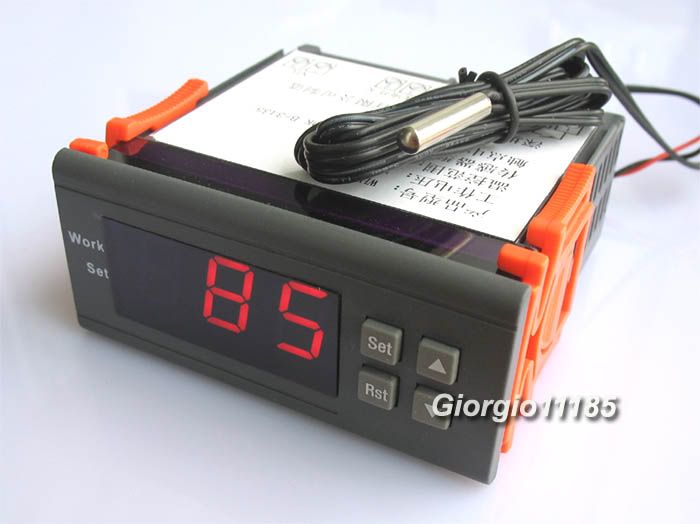
Digital temperature controller- $24.99 (Bought from anna758595 on Ebay)
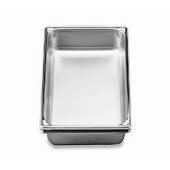
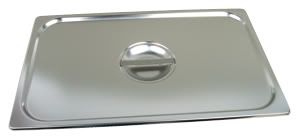
6" hotel pan with Lid- $33 at a local restaurant store
Tools:
Phillips head screwdriver
very small flat head screwdriver
Wire stripper
Wire nuts
8 to 12" of electrical wire (any power chord will do)
Metal saw of some kind (I used a pneumatic cutting wheel I got at Harbor freight for $14)
So here we go:
I started with one of these-
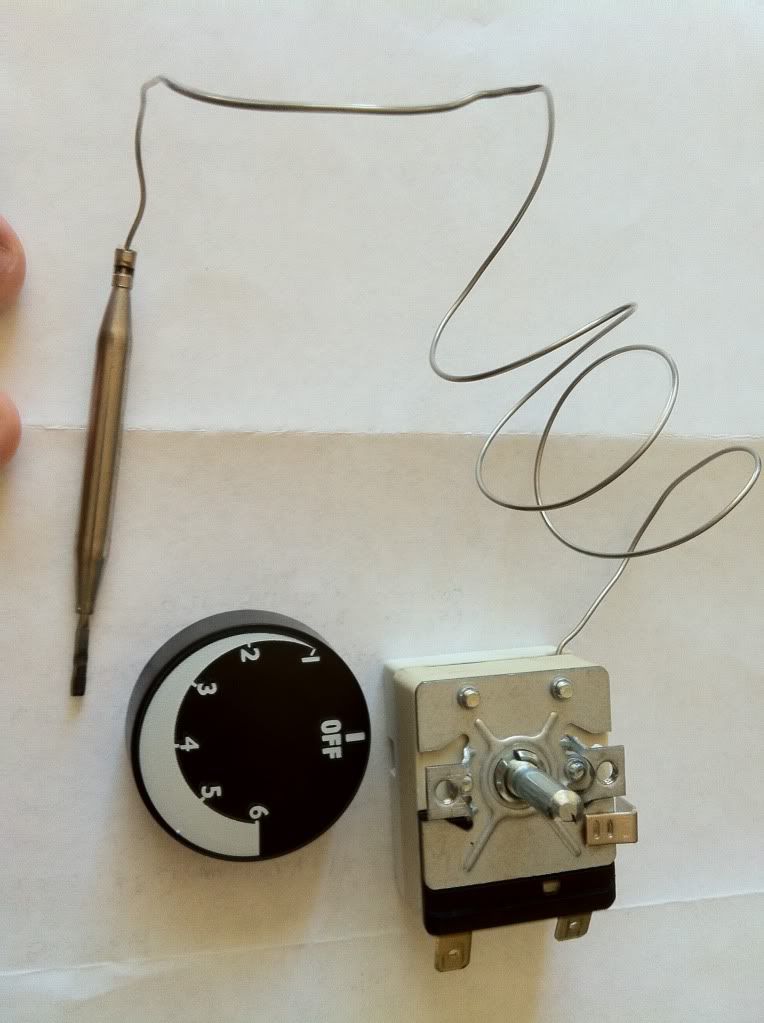
1)The black dial just pulls off, you can tear off the sticker if you like and remove the two screws on the front.
2)Flip the unit over and remove the six screws that hold on the bottom plate. Just know that you are about to void your warranty!

3)Loosen the two screws that hold the temperature probe in place and remove the clips holding the wires to the existing temperature controller. Remove the temperature controller-
 You're on your own here for the next step... Please don't cut yourself
 4)Measure the dimensions you need to cut and scribe them in the metal. You want this to be precise so the controller fits tight and the pressure clips can hold it in place.
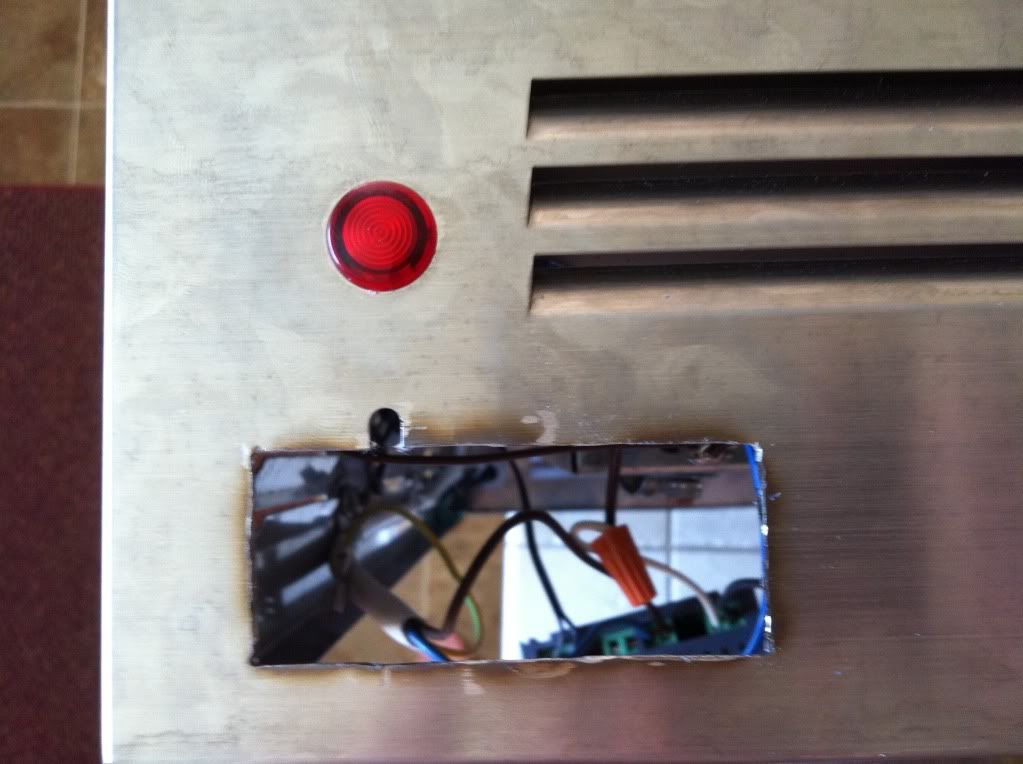
I know, it looks ugly but be patient.
This is the temperature controller that will fit in the cutout. Notice the orange pressure clips on the side. These will slide towards the faceplate and hold everything in place.
The silver tip is the temperature probe which will be fed up through the unit so it can be placed in the milk or double boiler, depending on your approach.
This unit is programmable and will turn the heating element on and off as necessary.
5) Now I will apologize for the lack of pictures. I thought I had hardware problems because I didn't have any supporting information so I was a little preoccupied. I finally figured it out though so instead of pictures, I'll give you a wiring diagram.
Again, please be careful here if you do not have a lot of experience. It's not that difficult but I don't want anyone to get shocked.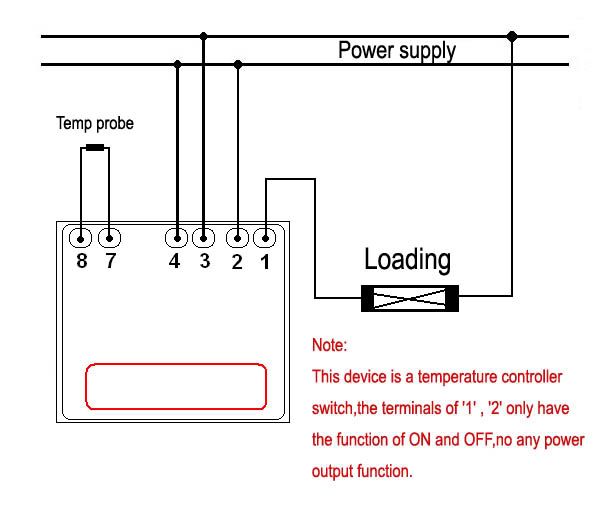
I needed a few extra pieces of wire and wire nuts to make the connections.
Here is the finished product:
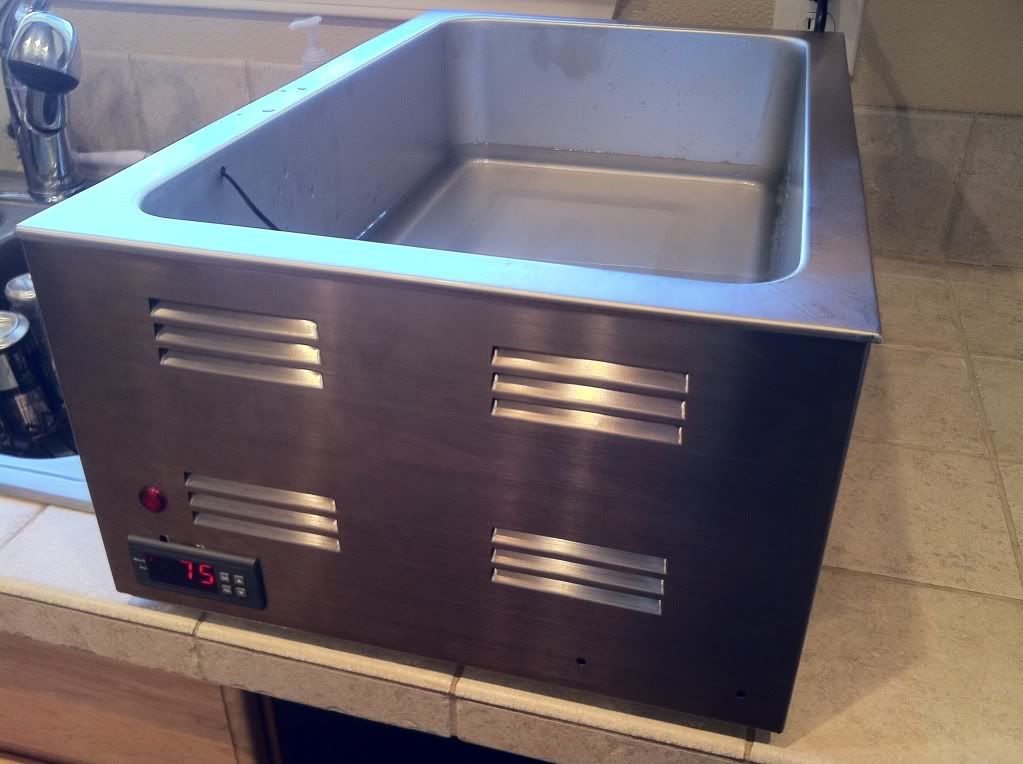
You'll notice the hole drilled in the side of the tub for the temperature probe. This is now sealed with high temperature silicone.
A six inch hotel pan with a lid will fit perfectly and holds almost 5 gallons of milk.
So that is the setup, please let me know if you have questions.
I hope this is helpful,
Jason


